Sunday, November 27, 2011

Thanksgiving Cards - Cute Turkeys

Wow!!  I sure do have a lot to post about today!  I'm really playing catchup!  Anyway, I wanted to share one of the Thanksgiving cards I made this year (the others were just different versions of this same card). 


I cut the shape of PTI's Gobble Gobble die to use as the turkey's body, and was searching for something creative to use for the feathers, when I came across this gorgeous paper by My Mind's Eye (Kraft Funday Happy Days paper).  I saw the patchwork circles on this paper and immediately thought of turkey feathers!  So, I went about cutting them out and they worked GREAT! 


On this card I also used PTI's Background Basics: Houndstooth set, Background Basics: Retro set, and 2009 Autumn Tags.  All of the plain cardstock is PTI as well.  I added a couple of buttons and wahlah!!  Aren't they cute! 

Thanks so much for visiting!

Kate

Birthday Party #3


Ok, so here's post #3 for the day...I'm on a roll (more on that in another post)!!  This is the 3rd installment of my birthday extravaganza weekend!  This card and bag was for my son Jake's friend Adam.  I used papers from My Mind's Eye - Lime Twist and some PTI cardstock for the card. 

I cut the polkadotted paper using PTI's notebook paper die, the large circle using a Nestibilities die, and the smaller Hawaiian Shores circle using PTI's 1/2" limitless layers die.  The letters in Adam's name were cut with PTI's new alphabet die.  The stamps in the circle are from PTI's new Tag-Its set, and the Happy Birthday sentiment stamp was in my stash.  I really love all the colors in this one and I think it's great for a boy!


I attached the card to the bag using a binder clip and added some ribbon in coordinating colors!  Thanks so much for visiting!

Kate

Pumpkin Bread - Yum!


Hi friends!  Two posts in one day...can you believe it?  I wanted to share with you the pumpkin bread goodies that I gave to the kids' teachers as Thanksgiving gifts this year.  My mom always made loaves and loaves of pumpkin bread when we were little, and I am so happy to carry on the tradition with my little ones!  Here's the recipe:

Pumpkin Bread

4 c flour
3 c sugar
2 tsp baking soda
1 1/2 tsp salt
1 tsp baking powder
1 tsp cinnamon
1 tsp nutmeg
1/2 tsp ground cloves
1/2 tsp allspice
1/4 tstp ginger
1 c oil
2/3 c water
1-15oz can pumkin
4 eggs
1 c chopped pecans

Sift all dry ingredients together and mix well.  Add wet ingredients (oil, water and pumpkin) and mix well.  Add eggs one at a time.  Fold in pecans.  Pour into 3 well greased and sugared loaf pans.  Sprinkle some sugar on top of mixture in loaf pans.  (Note that the sugar in the pans and on top of the loaves is optional.)  Cook for 1 hour at 350 degrees.  Cool for several minutes and turn out onto a wire rack to cool completely.  Enjoy!


I of course wanted to make the presentation as pretty as the bread is scrumptious, so I wrapped them all in parchment paper (after first wrapping them in cling wrap), and then tied them with some pretty green ribbon I found in a dollar bin somewhere.  I cut out some tags with the Cricut (from the Winter Frolic cart) and then stamped some 1 3/4" circles with a stamp from PTI's 2009 Autum Tags set.  I then cut a little sprig of artificial fall-like flowers from a bunch I had in my stash.  On the back of the tags I wrote, "Happy Thanksgiving from the Temples".  I hope that they enjoyed the bread and know how much we appreciate all they do!

Thanks for visiting (again)!!

Kate

Birthday Party #2

Hi friends!  What a fantastic Thanksgiving week/end we have had!!  Gorgeous weather, fantastic food, and the best company you can imagine!  First we had a small, intimate, relaxing Thanksgiving dinner with my parents and brothers on Thursday, then we had a wonderfully chaotic but fun dinner with John's side of the family on Friday.  John's mom had 24 for dinner, 12 of which were from out of town which made the day even more special.  On Saturday, I threw a surprise 40th birthday party for John at a local bowling alley.  Boy was he surprised!!  It was lots of fun and a great time to spend with even more extended family!

Well, as promised, here's the second installment of our marathon birthday weekend last weekend. 

This card and bag was for Brady's little friend Chase.  I recently acquired the Star Prints set from PTI, and I just had to ink it up!  I love how boyish this turned out!


I attached the card to the bag with a binder clip and added some fun ribbons to the handle.  


Super cute I think!


I just had to take a picture of the inside after Brady had signed the card.  I just love little boy writing!

Well, back to reality tomorrow!  It'll be nice to be back on a routine, but I'm going to miss getting to sleep in a little!  Oh, and if you could keep all of us in your prayers, John is taking an out of town assignment for a few weeks which is going to be really tough on him and on the kids (and me too I guess).  He'll be home with us on the weekends, but we sure are going to miss him during the week!  I pray that he is safe and not tooo miserable!

As always, thanks for visiting!

Kate

Tuesday, November 22, 2011

PTI's Make It Monday Challenge


Hi everyone!  I have a card to post for this week's PTI Make it Monday Challenge.  The challenge is to use your sentiment stamps as a subtle part of your background.  When I saw Betsy Veldman's example creation, I was floored, but also inspired and thought that this might be an easy challenge...wrong! 


I wanted to create a Christmas card that was "Christmasey" but not toooo literal.  So, I decided to pick sentiment stamps from my new Star Prints set for the background - "You're My Shining Star" but I left off the You're.  The tree is from the In the Meadow set which I stamped in Versa Mark ink and then heat embossed in white.  The star on the top of the tree is from Tag-Its #6 and is "haloed" by a stamp from Dot Spot. 


The focal sentiment is also from the In the Meadow set (which in hindsight should have been stamped in black).  I hand cut the hills.  I really wanted this card to pop, so I went with a striking color scheme of black, white, gray and ripe avacado (what the tree was stamped on). 

Can't wait for next week's challenge!  Thanks so much for visiting!

Kate

Monday, November 21, 2011

3 Birthday Parties!!

Hi friends!  Well, this weekend was a busy one!  My husband had a training class on Saturday, so I took the kids up to church to join in the yearly thorough cleaning for two hours.  I then dragged them through the craft fair that was also going on at church.  I then took them to McD's as a reward for being so good.  We then headed to WalMart to shop for gifts for the THREE birthday parties we had been invited to!  The first party was that afternoon, and it was for our cousin Landon's 5th birthday.  Sunday, we attended mass and then my husband and I split up to take the kiddos to the two remaining parties for two different school friends.  Finally, Sunday evening I was able to sneak away for a little while with my girlfriends for a much needed night out!

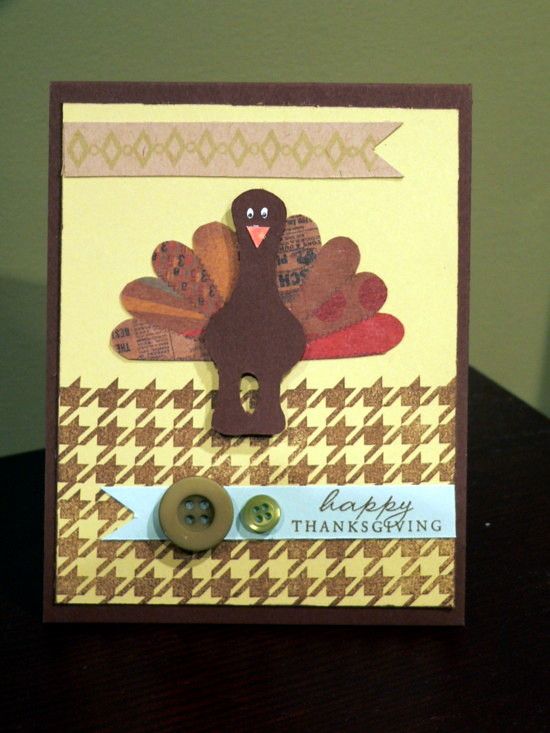
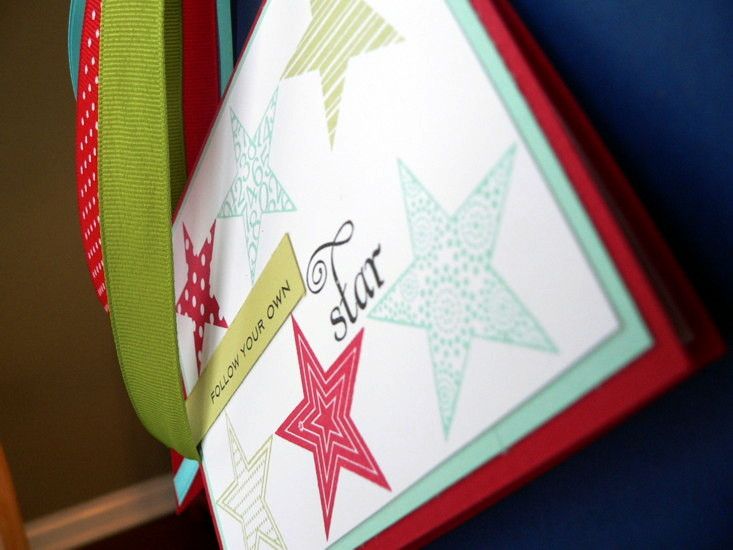
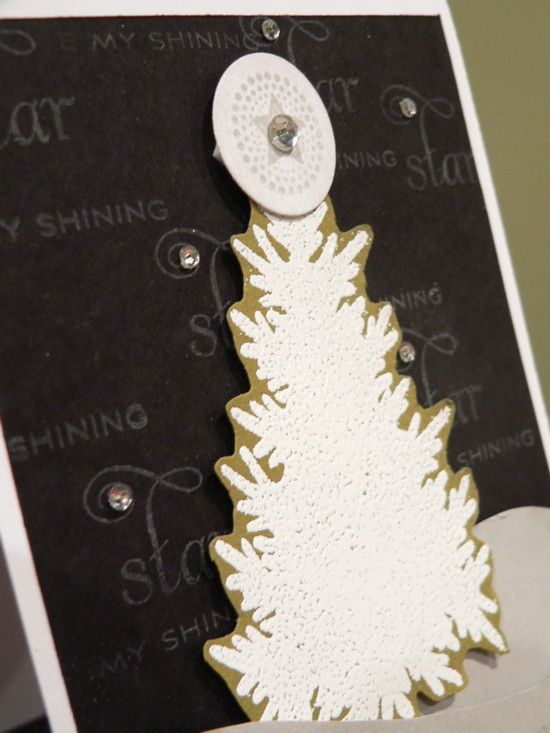
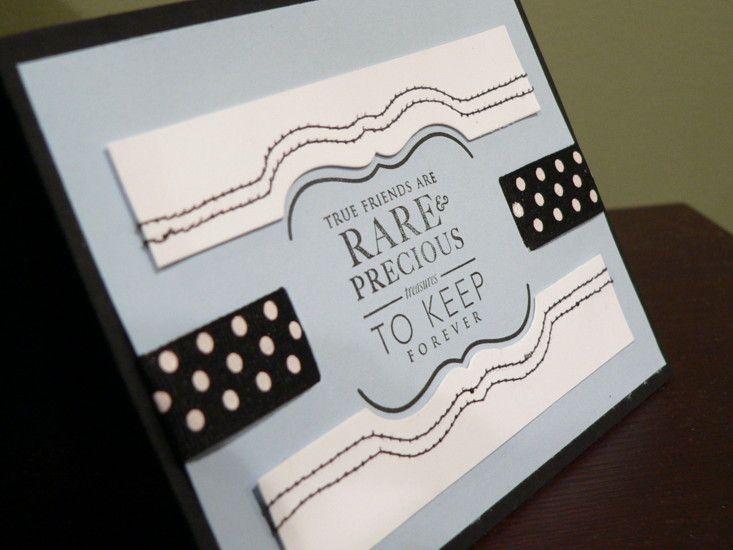
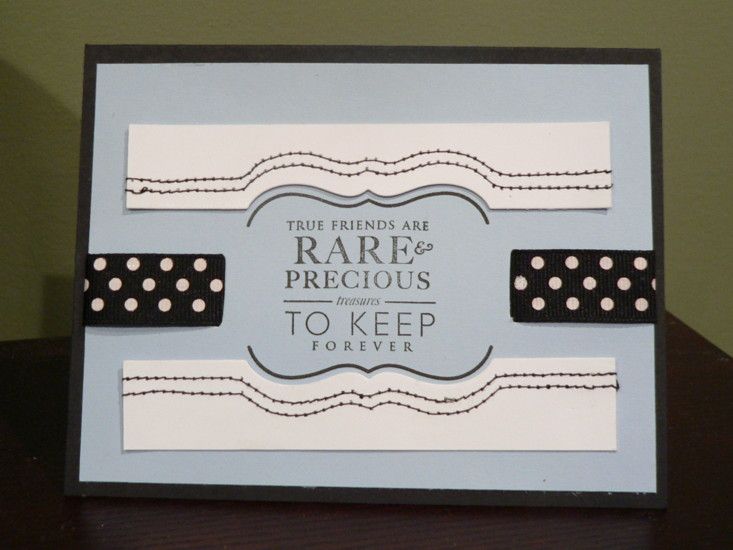
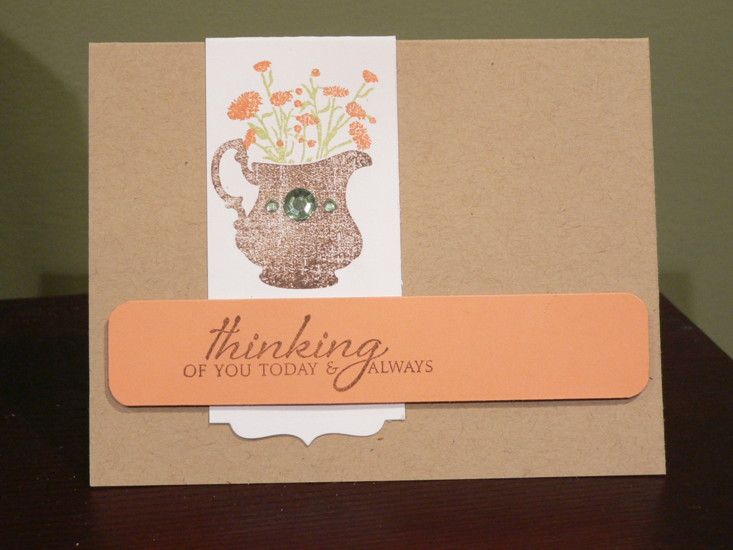
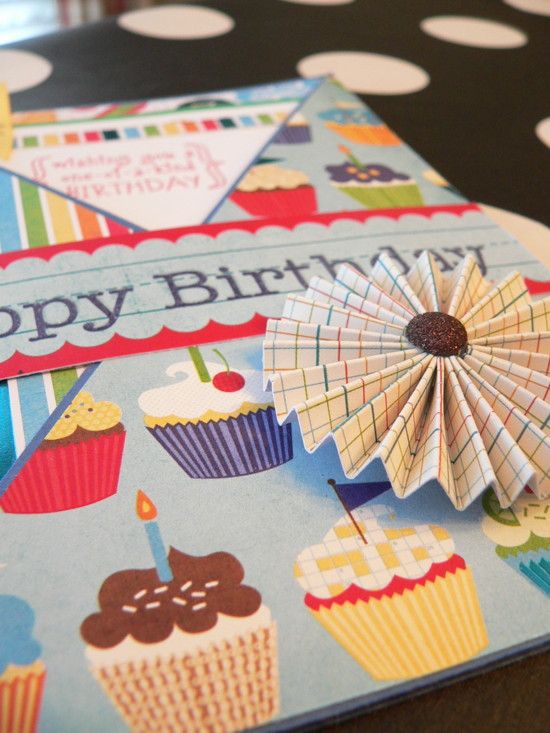
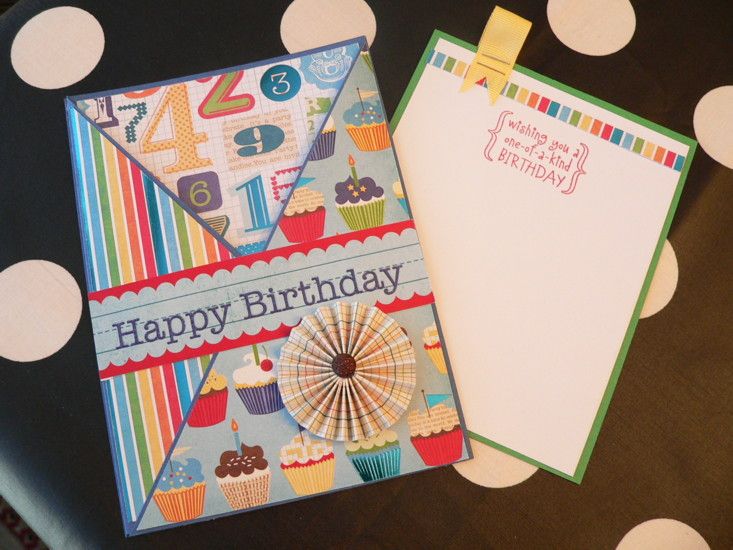
For each of the birthday parties, I created a card which I used to decorate each child's gift bag.  Today, I'm sharing the card and bag I created for Landon.  I TOTALLY copied this card from the one that Dawn McVey did for the last Papertrey release.  While they are not EXACTLY the same, they are pretty darn close!  Thanks for the idea/inspiration Dawn!  Sometimes a girl just needs a little help!


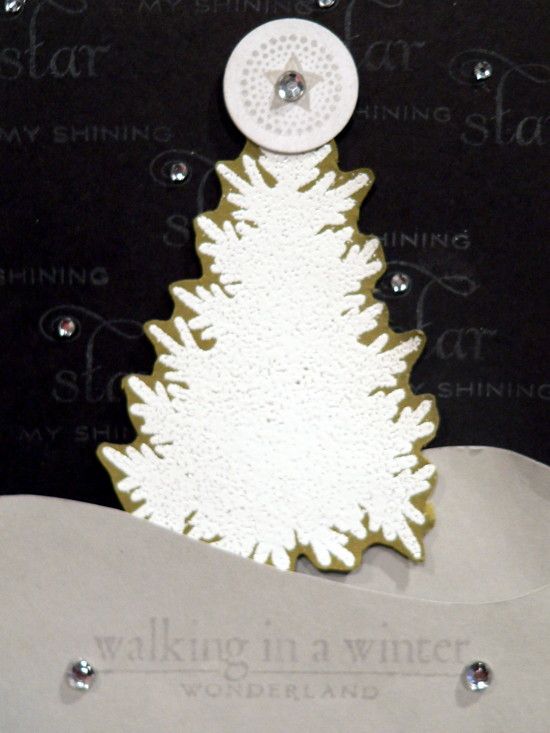
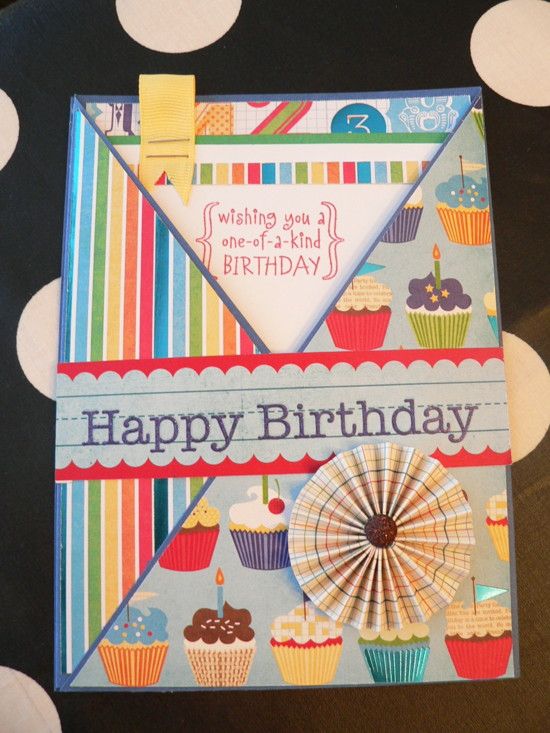
I just love the colors on this card (Kraft, White, Simply Chartreuse, Hawaiian Shores, and some green I had on hand)!!  I used one of the Background Basics: Retro stamps for the background, the Tag-its #10 for the circle and the balloons in the background, the Recollections Alpha Toon stamp set for the #5, and the Hero Arts Birthday Messages set for the Happy Birthday sentiment.  I used one of PTI's limitless layers dies for the background circle, and the new alphabet die for the "to you". 


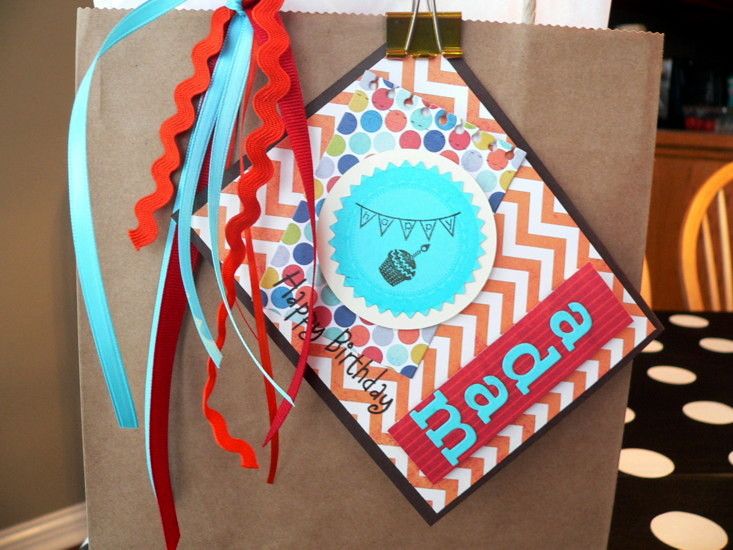
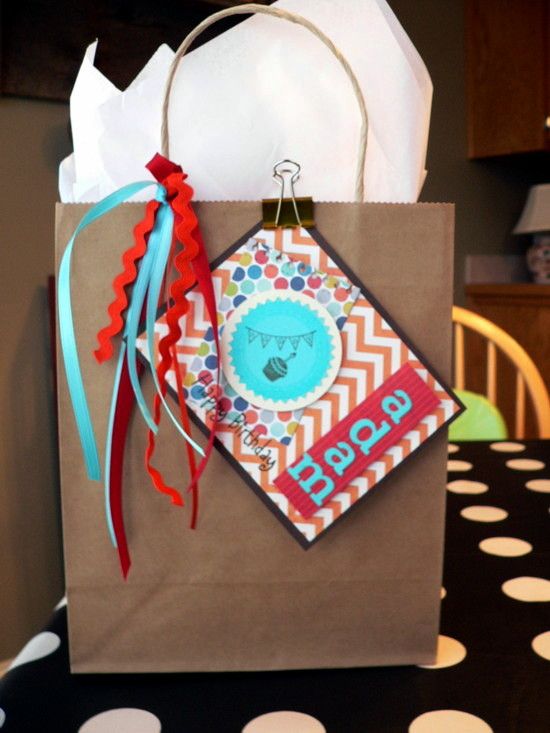
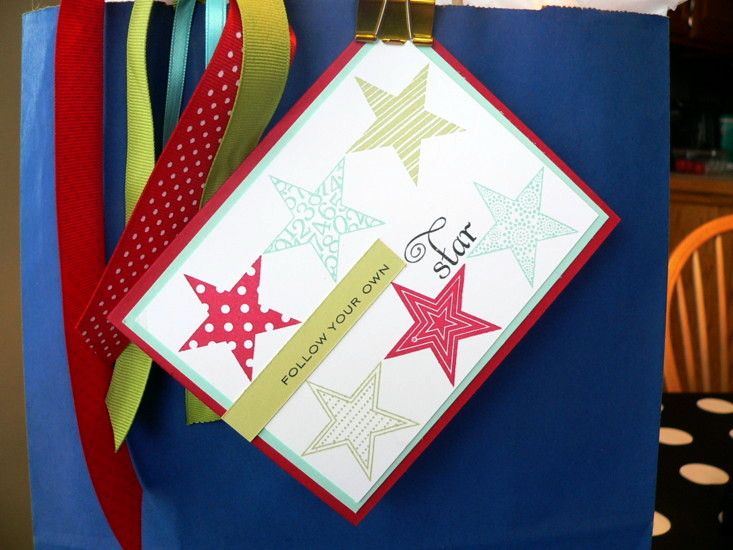
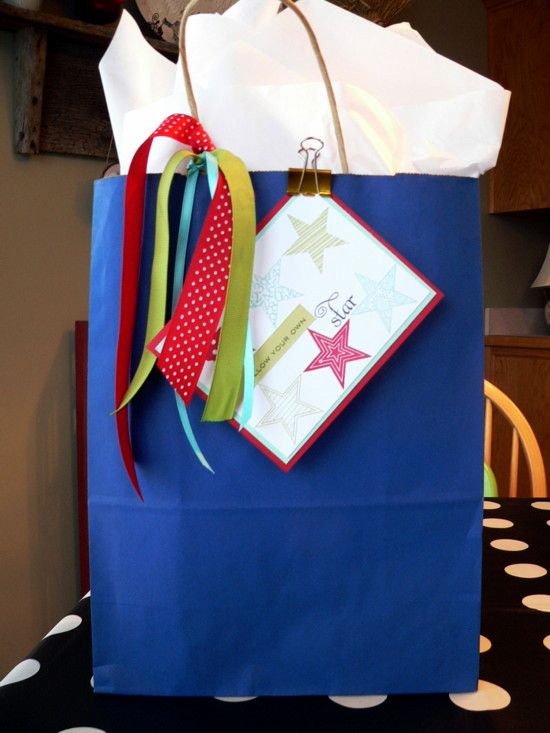
To dress up the plain kraft giftbag, I attached the card to the bag with a binder clip and added some ribbon in coordinating colors.  I also cut out the letters of Landon's name using the alphabet die and just adhered it right onto the bag.  This is such an easy way to dress up a plain bag!


The party was lots of fun, and the kids had a great time hanging out with their cousins!  Tomorrow I'll post another one of the gift bags from the birthday marathon weekend!

As always, thanks for visiting!

Kate

Wednesday, November 9, 2011

Stamps for Sale!!

Hi everyone!!  Today's post is something I've never done before...I'm selling off some of my stamp collection.  When I first got into the world of stamping, I was introduced to The Angel Company, which I'm sad to say is no longer in business.  After being introduced to this unique company, I purchased quite a few of their sets, but I find that I am no longer using them!!  They all stamp perfectly...I just don't need them, and I want to make room for NEW stuff!  So, I thought that maybe some of my "old" stuff could become some of YOUR "new" stuff! 

All of my TAC stamps are stored in CD cases, and I have taken pictures of them either individually or in groups.  What you see in the picture is what you get for the price indicated below the pic.  The prices all include shipping within the US.  (International buyers will need to pay actual shipping prices.)  Many of these stamps are no longer in their original "sets", I have sort of made my own "sets", and I don't know the "official" names of any of the sets I have, so I've given them my own names too.  If you are interested in something, you may email me at meyer_kate@hotmail.com .  If you would like multiple sets or would like to make me an offer, I am negotiable!

Also...so sorry for the photo quality here...for some reason I just couldn't keep a steady hand tonight!

Thanks so much for looking!

Kate

Fancy Bet - $5


Random Christmas $4


Seasons - $4


Medallions - $4


Potted Plants - $5


Flourishes - $4


Fancy Flourishes - $4


Grunge Alphabet - $5


Christmas and New Years - $3


Birthday - $3


Butterflies and Random Flowers - $4


Fairy and Stars - $3


Christmas Threes - $5


Circle Bet - $4


Christmas Stretch - $3


Random - $4


Tiny Birthday - $4


Sprouts - $5


Tags - $5

Monday, November 7, 2011

Challenge Monday!!

Hi friends!  Today was absolutely gorgeous here in Kentucky!!  Probably one of the most beautiful fall days I have ever experienced!! 


I wanted to participate in a couple of challenges this week.  First is the Papertrey Ink Make it Monday Challenge which asked us to try a technique Heather Nichols calls Reverse Applique.  Basically, this means that you die cut an image and then stitch the remaining negative space to your card.  I do not own very many PTI dies, so I had to come up with a different twist on this challenge.  I used one of the Holiday Photo Finishers dies and stitched the remainder of the paper (not the actual die cut piece) to my card.

The second challenge is the Celebrating Relationships Challenge in the Moxie Fab World.  So, I used PTI's Holiday Photo Finishers stamp set and one of the Half & Half sentiment stamps which celebrates friendship. 

I threaded the ribbon through the card front, which makes it look like it disappears behind the sentiment. 


I decided to stitch (with my machine) in black on the white paper because I really wanted the stitching to stand out.  I have to say that this was quite a tedious job, because I basically had to hand crank my machine in order to place the stitches exactly where I wanted them.  I think the extra effort really paid off though! 

As always thanks for visiting!!

Kate

P.S.  I also submitted this card for the Cuttlebug Spot challenge since I used the Cuttlebug to do the die cutting!

Sunday, November 6, 2011

Simple Sympathy Take 2


Hi friends!  I needed to make another sympathy card for my friend's sister, and so I decided to use the same design as the one I just posted, but I changed up the colors to meet the requirements of the current Passion for Papertrey challenge.  The latest challenge asks followers to use the colors green, brown and peach in a design incorporating PTI products.  So...I used PTI's craft, white and mellon berry cardstock and stamped the Iconic Images images in chocolate brown, "peach" and green.  I then added adhesive green rhinestones to the pitcher.  Thanks so much for visiting!


Kate

Simple Sympathy Card

Hi everyone.  Today's post features a card I made recently for a friend who just lost her dad to a long battle with cancer. 


I wanted to keep it pretty simple, so I just used a few PTI stamps and dies.   The craft, white and aqua mist carstock are all PTI.  The white strip was cut using one of the PTI Half & Half dies, and was stamped with the pitcher and flower images from PTI's Iconic Images stamp set.  The aqua mist strip of paper was hand cut and stamped with a sentiment from the Iconic Images set as well. 


I felt like the pitcher needed just a little something else, so I added a few Recollections adhesive rhinestones.  I also used my corner chomper to round the two corners of the card as well as the corners of the aqua strip. 


Simple, quick, but quite lovely I think.  Hope she enjoys it.

As always, thanks for visiting!

Kate

Saturday, November 5, 2011

Criss-Cross Birthday Card for Chris


Hey everyone!  Tonight I have a card that was inspired by one I saw on Faith Abigail's blog recently...it's called a criss-cross card, and I made this one for my brother Chris...fitting, don'cha think?  The full card measures 5"x7", and has a pull out card that measures 4.75"x6".  I used papers from a DCWV stack I picked up recently at JoAnn's, called the Celebration Stack.  I just LOVE the paper in this stack!!  So stinkin' fun! 


I could go into tons of directions on how to make this card (which really was very simple actually), but if you want to see a video tutorial of a similar card, you can visit Faith Abigail's blog.


I will add that I hand made the rosette that is at the bottom of the card.  I took a 1.5"x12" strip of paper, scored it every 1/4", folded it accordian style, glued the two ends together, adhered the rosette to a plain circle backing, and added an adhesive glitter dot to the front.  Super simple!


Thanks so much for visiting!!

Kate

Tuesday, October 25, 2011

Papertrey October Blog Hop


Hi everyone!  I really wanted to participate in Papertrey's Blog Hop this month, and I nearly ran out of time!  I was the very last entry and got it in right at 11:30pm!  

 I just love the picture Nichole and the team used as inspiration this month:


How could you not be inspired by this photo?

At first, I thought that I would make a card, but then I was surfing the net the other day and I came across this post by Jamie Lee at Bits of Paper.  Her simple tutorial on how to make paper pumpkins gave me a great idea.  Instead of using preprinted patterned paper for this project, I made my own using my limited stash of Papertrey stamps and papers.  From the pictures below you will see that I used PTI Vintage Cream, Kraft, Mellon Berry, Spring Moss, New Leaf, and Orange Zest cardstock cut into 5.5" circles. 


I used the following stamp sets to create the different papers:  Iconic Images, Holiday Photo Finishers, Beatiful Blooms II, Background Basics: Retro, Signature Greetings, Mehndi Medallion, and Big & Bold Wishes.  Most were stamped with some old SU inks, but a couple were stamped with VersaMark and then heat embossed with white embossing powder. 


The stem on top is just a piece of Chocolate cardstock rolled up and tied with a few ribbons from my stash. 


I threw this project together in about an hour and a half, which was pretty quick considering I had not designed even one paper before starting.  If I had had more time, I would have added a few leaves to the top and done some better photography, but what you see is what you get!  Hope you like it!

As always, thanks for visiting!

Kate